Welcome, and thank you for joining us! In today’s video, we’re going to walk you through how to crochet an adorable baby jacket using the beautiful honeycomb stitch. This stitch creates a soft, textured pattern that looks intricate but is surprisingly easy to do once you get the hang of it. Whether you’re crocheting for your own little one, making a baby shower gift, or adding to your handmade collection, this jacket is sure to be a treasured piece.
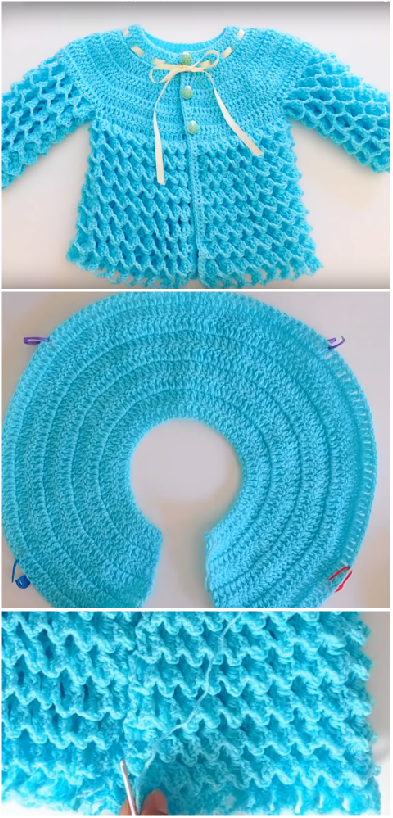
We’ll start by showing you how to work the honeycomb stitch itself, step by step, so you can become comfortable with the rhythm and structure of the pattern. Then, we’ll guide you through shaping the different parts of the jacket — the back, front panels, sleeves, and hood (if included). Everything will be explained clearly, with close-up shots and tips to help you along the way. Don’t worry if you’re still a beginner — we’ll take it slow and make sure you can follow along with ease.
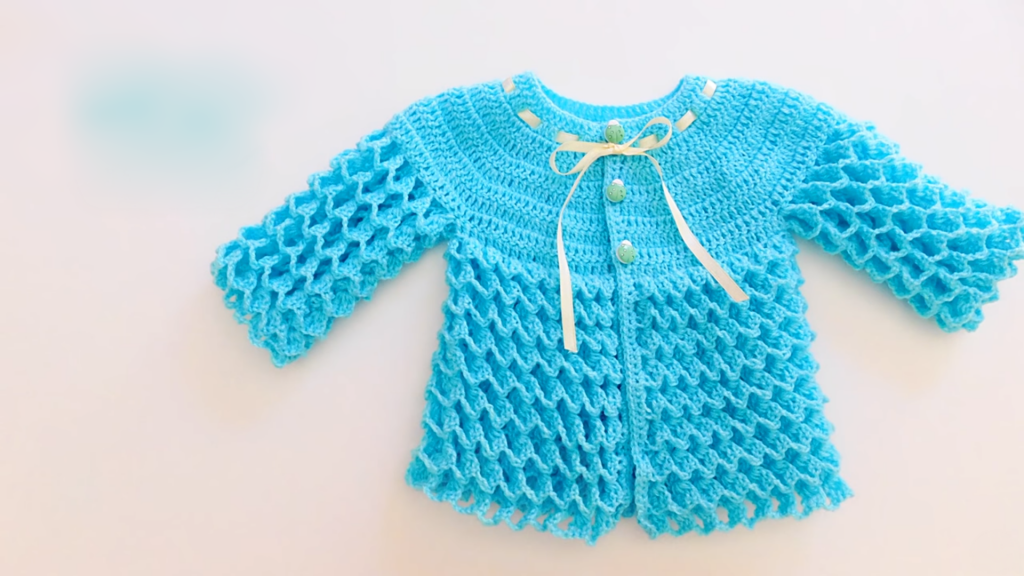
This baby jacket isn’t just cozy and cute — it’s also practical and wearable. You can make it in your favorite yarn colors, adjust the size for different ages, and even add buttons or decorative touches to personalize it. The honeycomb stitch adds a delicate, quilted texture that gives the jacket a high-quality, boutique look, while still being soft and comfy for baby’s sensitive skin.
So grab your yarn, hook, and a cup of something warm — and let’s get started. Don’t forget to pause or rewind the video whenever you need to, and feel free to make it your own as you go. If you enjoy this tutorial, please like the video, subscribe to our channel, and tap the bell icon so you won’t miss any of our upcoming crochet projects. Let’s create something beautiful together for the little ones we love.
Tutorial and photos of this crochet blanket stitch by: Liliana Milka