A white crochet shrug isn’t merely an accessory—it’s a graceful fusion of craftsmanship and style.
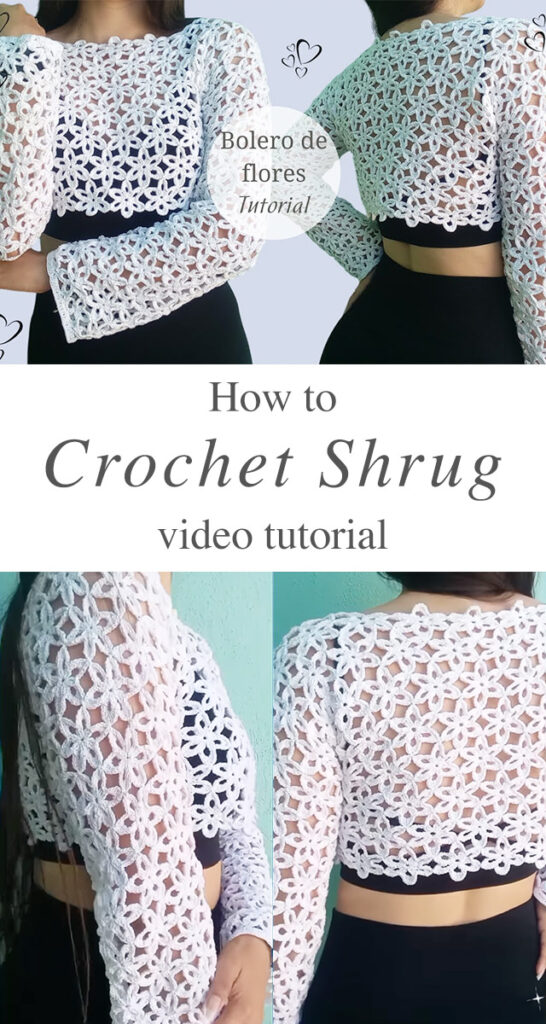
THE WHITE CROCHET SHRUG
Perfect for layering over a summer dress or serving as a stylish lightweight cover-up, this classic piece is an essential addition to your wardrobe. Meticulously handmade with delicate patterns, a crochet shrug brings a touch of sophistication and cozy charm without overpowering your outfit. For those passionate about DIY fashion, this step-by-step guide will help you master the art of crafting your own elegant white crochet shrug.
Let’s explore everything from its versatility to how you can crochet one yourself.
Materials
The beauty of a crochet shrug lies in its texture, stitch pattern, and yarn choice. Selecting the right materials ensures a high-quality finish. You’ll need 400 grams of white yarn Nr.6 and a 1.25mm crochet hook.
Why a White Crochet Shrug Belongs in Your Wardrobe
A crochet shrug serves as a fashionable and functional piece. But why choose white? Here are some reasons this color and style are a winning combination:
- Versatility: White matches nearly anything, making it ideal for layering over different outfits.
- Timeless Appeal: Unlike trendy colors, white remains elegant season after season.
- Handmade Charm: Crochet garments exude craftsmanship and uniqueness, unlike mass-produced alternatives.
- Perfect for Any Occasion: A white crochet shrug can be casual, formal, or even bridal, depending on the design.

Step-by-Step Guide
If you’re ready to craft your own shrug, follow this step-by-step breakdown inspired by the tutorial.
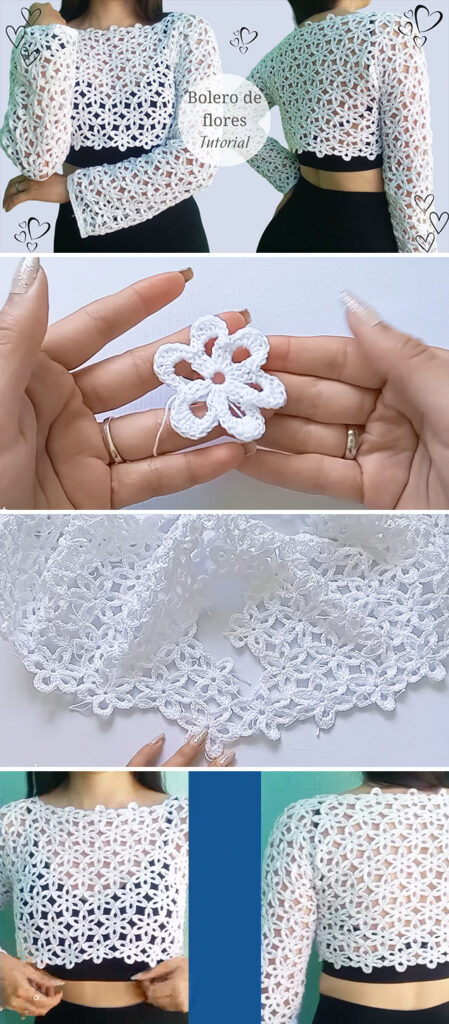
1. Create the Floral Motifs
For a stunning openwork effect, you’ll be making interconnected floral motifs:
- Start with a magic ring and chain 6.
- Form a loop and work single crochets into it.
- Expand the flower with chain loops and double crochets.
- Connect each floral motif as you go to build the fabric.
Repeat this process until you have the necessary length and width for your shrug.
2. Assemble the Pieces
Once you’ve crocheted enough motifs:
- Fold the fabric in half to create armholes.
- Seam the sides together with slip stitches or single crochet.
- Leave openings for the arms, adjusting based on your desired fit.
3. Add Finishing Touches
To make your shrug even more elegant:
- Crochet a scalloped edge along the sleeves and hem.
- Add delicate picot edging for a more detailed finish.
- Block your shrug to set the stitches evenly and prevent curling.
Style Your White Crochet Shrug
This versatile piece can be worn in multiple ways, making it a fantastic addition to your wardrobe.
Casual Chic
Layer it over a tank top and jeans for an effortlessly stylish daytime look.
Evening Elegance
Pair it with a sleek black dress for a striking contrast that oozes sophistication.
Boho Beauty
Match it with a maxi dress and sandals for a dreamy, free-spirited vibe.
Bridal Bliss
A white crochet shrug can be the perfect addition to a wedding gown, adding a handmade, romantic touch.
Caring for Your White Crochet Shrug
Handmade crochet garments require special care to maintain their beauty and durability.
Washing Instructions
- Hand wash in lukewarm water with a mild detergent.
- Avoid wringing; gently squeeze out excess water.
- Lay flat to dry on a towel to preserve its shape.
Storage Tips
- Store in a cool, dry place.
- Fold neatly instead of hanging to prevent stretching.
- Keep away from direct sunlight to maintain its crisp white color.
A white crochet shrug is a true testament to the beauty of handmade fashion. Whether you’re crocheting one for yourself or as a heartfelt gift, this piece is sure to become a treasured staple. With the right yarn, stitch pattern, and styling, it seamlessly blends comfort and elegance.
Ready to get started? Follow the tutorial, grab your crochet hook, and create your own exquisite white crochet shrug today!
Tutorial and photos of this crochet shrug by: isabella.crochett.