Perfect for holiday gifting, this crochet wicker bag makes for a thoughtful and stylish handmade present. Simply follow this step-by-step tutorial to create it effortlessly.
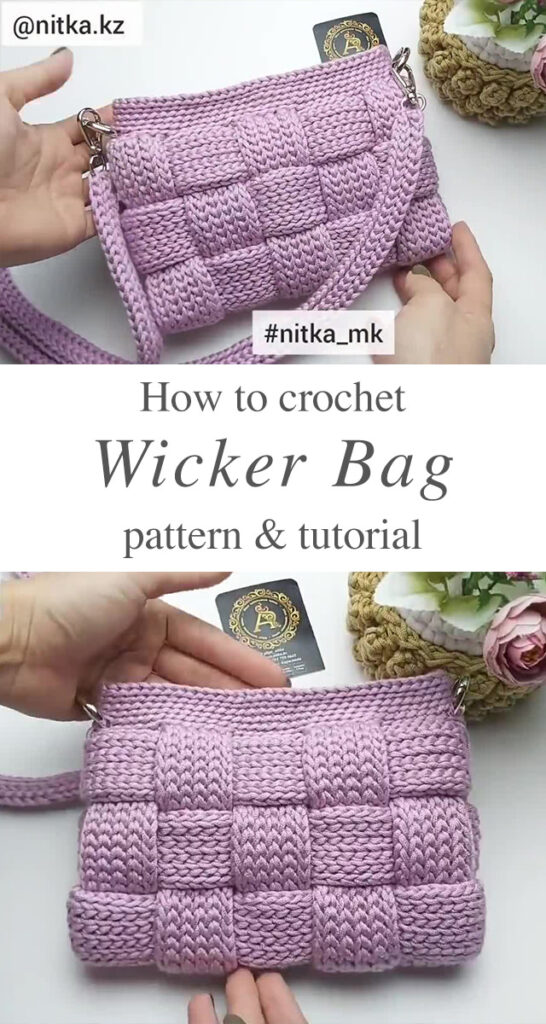
THE CROCHET WICKER BAG
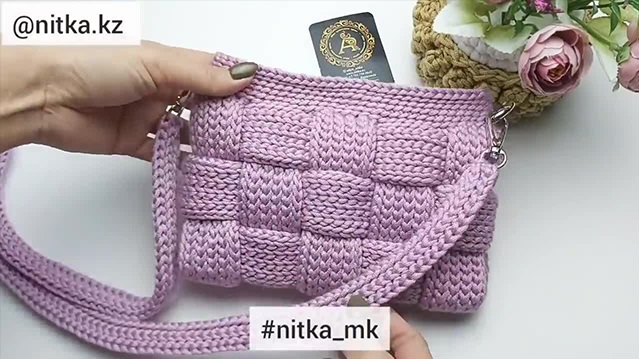
This crochet wicker bag is a quick and easy project that requires minimal yarn. With just basic slip stitch skills, you can complete this stylish bag in no time. It’s the perfect choice for beginners looking to create something both practical and beautiful.
Continue reading to discover the crochet pattern and step-by-step video tutorial for creating this stylish wicker bag.
Materials
To craft this stylish crochet wicker bag, you’ll need a 4 mm crochet hook, acrylic cord with a 3 mm thickness, a flexible frame (20 cm) or a magnetic clasp, a shoulder strap with two hangers, and two rings.

Abbreviations:
- Chain(s) = Ch
- Stitch = St
- Back loop only = BLO
- Slip stitch = sl st
Pattern of the Crochet Wicker Bag
First strips:
– Slip knot, start with chain 43.
– Working in the back pump of the chains, sl st to the 2nd ch from hook, sl st across the chains, ch1, turn. [42st]
– Working in BLO, sl st across the row, ch1, turn. [42st]
– Repeat previous row for 7 more times, ch44.
– Working in the back pump of the chains, sl st to the 2nd ch from hook, sl st across the chains, ch1, turn. [42st]
– Working in BLO, sl st across the row, ch1, turn. [42st]
– Repeat previous row for 7 more times, ch44.
– Repeat previous 3 steps for 3 more times. (5 strips connected together)
Second strip: (make 3)
– Slip knot, start with chain 71.
– Working in the back pump of the chains, sl st to the 2nd ch from hook, sl st across the chains, ch1, turn. [70st]
– Working in BLO, sl st across the row, ch1, turn. [70st]
– Repeat previous row for 7 more times, fasten off, leave 15cm tail to use later

- Using the yarn tail and with tapestry needle, sew the 2 ends together.
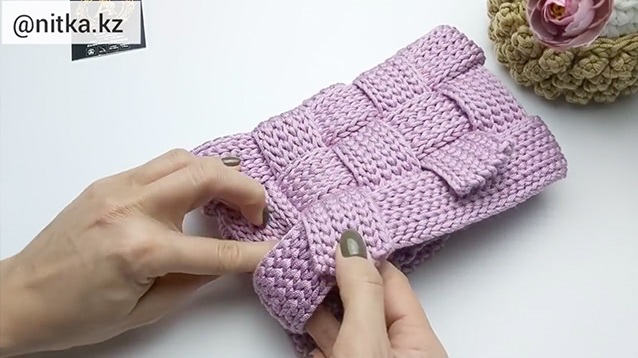
- Spread the attached strips on the table.
- Get one of the second strips and interlace the strips in a staggered order.
- Repeat for the other two strips.
- Use the remaining parts of the connected strips, and wrap them across the backside of the second strips in a staggered order.
- Tie the ends to the strips using markers.
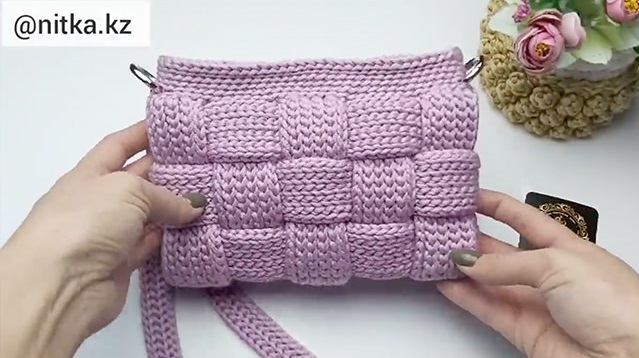
- Use the yarn in the first strips, sl st across to connect the 2 ends together.
- If you will use a flexible frame, sc across the frame until be invisible, here we made 72st.
- Sl st between the bag top stitches and the frame stitches, fasten off, weave in all ends.
- If you will use a magnetic button, continue working from the last sl st row, ch1, sl st across the round, repeat for 5 rounds, fasten off, weave in ends.
- Sew the magnetic button to the middle of the bag inside.
Tutorial and photos of this crochet wicker bag by: Nitka kz.