When the sun shines brightly and the breeze carries hints of lavender and ocean spray, there’s one accessory that perfectly blends charm and practicality: the crochet sunhat.
THE CROCHET SUNHAT
A crochet sunhat is more than just a charming DIY project—it’s a blend of artistry and practicality. Its breathable design makes it ideal for sunny days, while the diverse stitches offer endless possibilities for customizing shape, firmness, and style. Unlike mass-produced hats, a crocheted sunhat can be perfectly tailored to fit your head, reflect your personal style, and complement your seasonal wardrobe. Crafting one also allows for a delightful exploration of texture—from tightly woven brims to airy, open stitches on the crown—combining durability with elegance in a single, cohesive piece. It’s creativity that’s both beautiful and functional.

Combining vintage charm with enduring practicality, this handmade essential protects your skin while elevating your summer look. Whether you’re an experienced hook user or new to crocheting, creating a crochet sunhat provides a rewarding experience with stylish outcomes.
Materials
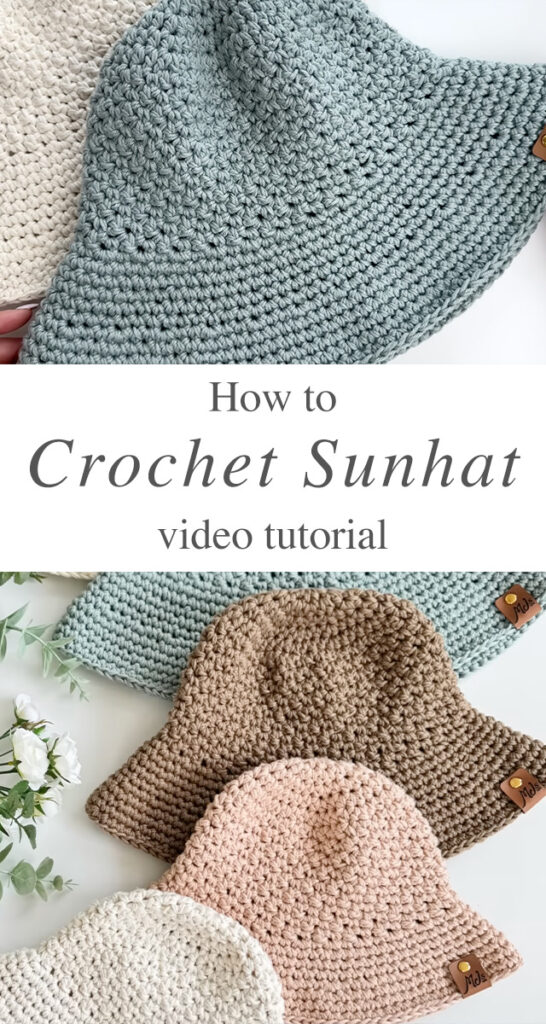
To create your crochet sunhat, gather a few essential materials. Begin with worsted weight cotton yarn—Dishie by Knit Picks is an excellent option, offering durability and breathability perfect for warm weather. Use a 5mm and a 6mm crochet hook, selecting based on your tension and the hat’s desired firmness. A stitch marker will help you track your rounds as you shape the crown and body. Be sure to have sharp scissors and a yarn needle on hand for weaving in ends cleanly. For a refined, boutique look, consider adding a faux leather or wooden tag like those shown in the image. Choose light, natural, earthy tones for your yarn to reflect sunlight and effortlessly complement summer outfits.

Step-by-Step Instructions
The process of crafting a crochet sunhat unfolds like a well-paced summer afternoon: steady, satisfying, and joyfully simple.
1. Start with a Magic Ring
Begin by forming a magic ring and crocheting a set number of single crochets into it. This forms the crown—the top of your hat. Increase evenly in each round by adding stitches at intervals to keep your circle flat and symmetrical.
By round six or seven, you’ll notice a gently widening disc, the foundation of your sun-defying crown.
2. Build the Body of the Hat
Once the crown reaches the desired diameter (typically around 6.5 inches for adult size), stop increasing and crochet evenly around to build the sides. This forms the body of your sunhat, shaping it gently downward for that classic silhouette.
Depending on your tension and yarn, this section may require 12–16 rounds. Keep your stitches snug and even for a structured finish.
3. Shape the Brim
The brim is what gives your crochet sunhat its iconic character. It needs structure and slight rigidity. You’ll achieve this by reintroducing increases—gradually and evenly—to gently flare the hat outward.
This section may span 8–12 rounds. For extra structure, some crocheters opt to slip in a lightweight wire or invisible thread along the final round, but it’s totally optional.
Finish the brim with a round of slip stitches for clean edging.
4. Add Finishing Touches
Weave in all ends securely. You can embellish your sunhat with a decorative leather tag (as seen in the featured image), a crocheted band, or even a string of wooden beads.
Want a boho twist? Weave a long strand of contrasting yarn or raffia around the base of the crown and tie it in a bow. Functional and fashion-forward.
Tips for the Perfect Fit and Finish
- Gauge Matters: Do a small gauge swatch before starting. Slight variations in tension can drastically alter your hat’s size.
- Try As You Go: After the crown and every few rounds, place the piece over your head. Adjust the number of increase rounds or the body height as needed.
- Stiffening: If your brim is too floppy, mist it lightly with water and shape it, then let it dry flat. You can also spray it with a light starch solution for extra hold.
- Sunhat Variations: Play with different stitches like half-double crochets or puff stitches for texture. You can also create a wavy brim for a flirty flair.
Styling Ideas for Your Crochet Sunhat
The beauty of a crochet sunhat is in its versatility. Pair it with:
- A flowing sundress and sandals for beachside elegance
- Denim shorts and a linen top for farmers’ market chic
- A simple swimsuit and a book for poolside lounging
The natural texture of cotton yarn pairs beautifully with breezy summer fabrics. For added sun protection, crochet a slightly longer brim or double-strand your yarn for a denser weave.
There’s something magical about weaving yarn into a shape that not only protects you but also tells a story. A crochet sunhat isn’t just an accessory—it’s a testament to skill, patience, and summer dreams. With every stitch, you’re crafting more than fabric. You’re creating memories stitched into sunlight.
So grab your hook, find your favorite cotton yarn, and follow along with the video tutorial. Your handmade sunhat is waiting to crown your summer adventures.
Tutorial and photos of this crochet sunhat by: MJ’s Off The Hook Designs.