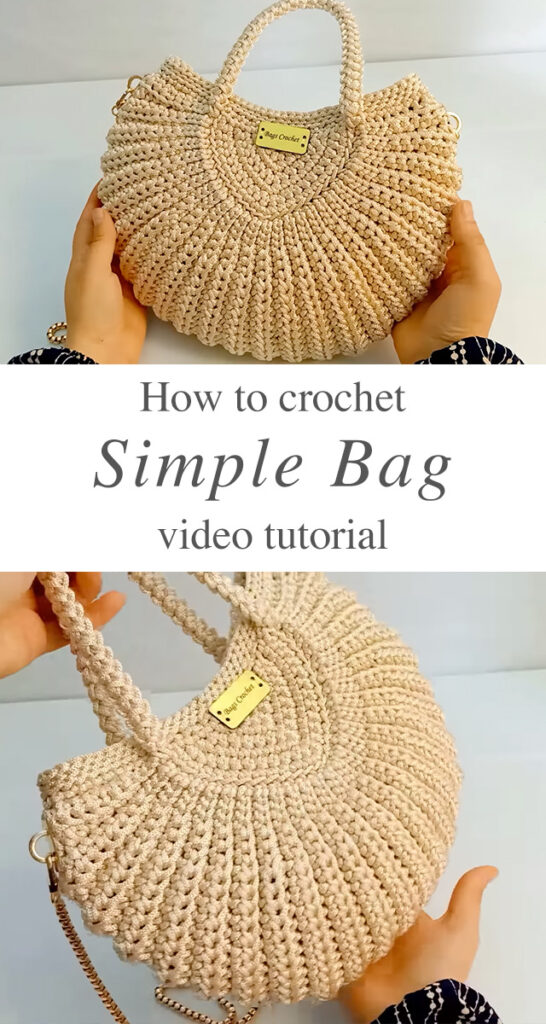
Handmade fashion exudes charm, and few accessories rival the elegance of a beautifully crafted crochet bag. This classic staple effortlessly enhances your wardrobe with its unique flair while offering practical functionality for everyday use.
The Beauty of a Crochet Simple Bag
Handmade accessories hold a unique charm, and a simple crochet bag is no exception. It seamlessly combines function with artistry, opening the door to limitless creative possibilities. This design showcases a round, fan-inspired shape with a textured pattern that exudes both elegance and character. The best part? It’s crafted using basic stitches, making it perfect for beginners eager to create something striking without stress. Crochet bags aren’t just fashionable—they’re eco-friendly, long-lasting, and easily customizable to complement any wardrobe. With the right choice of yarn and a little dedication, this piece can quickly become your favorite go-to accessory.
If you’re new to crocheting or simply looking for a simple yet striking project, this step-by-step guide, inspired by the video tutorial below, will teach you how to craft a stylish and durable round crochet bag.
Materials
To craft your own simple crochet bag, gather these essential materials: a 280m roll of 3 mm polyester cord yarn for durability and a sleek finish, a 5.0 mm crochet hook to pair with medium-weight yarn, stitch markers to keep track of your progress, sharp scissors, and a yarn needle for tidying up loose ends. For a polished, professional look, consider adding gold or metallic clasps and a chic chain strap, as shown in the tutorial. Optionally, you can include a lining fabric to provide extra structure and protect the interior of your bag. High-quality materials will ensure your handmade bag is both elegant and built to last.
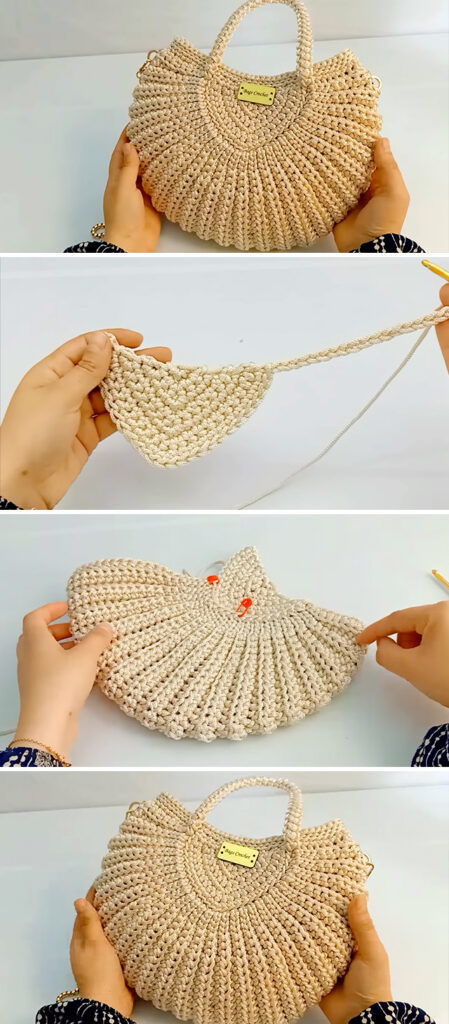
Crafting the Base Circle
The circular base serves as the starting point for your crochet bag, crafted seamlessly in continuous rounds. Begin with a magic ring—a fundamental technique that ensures a tightly closed center for a polished and professional finish.
- Begin with a magic circle.
- Work single crochets into the ring—usually 12 to start.
- Increase rounds gradually, adding stitches evenly to form a flat circle. For instance, increase every stitch in round two, then every second stitch in round three, and so on.
- Continue building until your circle reaches the desired width (typically 25–30 cm in diameter).
This technique ensures a solid, uniform foundation with even tension throughout. Keep a stitch marker handy to mark the start of your rounds—it’s a true lifesaver!
Sculpting Texture with Puff Stitch Magic
What sets this crochet simple bag apart is its incredible texture. The puff stitch gives the bag its signature 3D look, creating a structured and stylish surface. Here’s how to add that character:
- Start puff stitches evenly spaced around the circle.
- Yarn over and pull up a loop several times (usually four) before pulling through all loops on your hook.
- Chain one between puffs to give the stitches room to breathe.
Repeat this puff stitch pattern across subsequent rounds. As the bag grows, the texture will blossom into a sunburst-like design—elegant and tactile. It’s a soothing rhythm once you get the hang of it, and it builds quickly into something beautiful.
Assembling the Crochet Simple Bag
Once you’ve completed two identical circular panels, it’s time to join them and form the body of the bag.
- Place the panels wrong sides together.
- Join with slip stitches or single crochet around the edge, leaving a wide enough gap at the top for the opening.
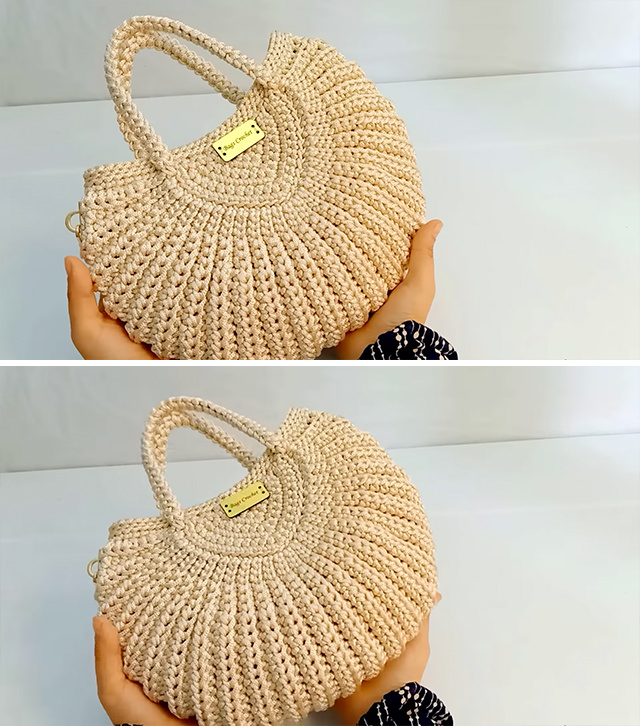
- Attach the handles—either crochet them directly using puff stitches for a cohesive look or use wooden/metal handles for a different vibe.
For a luxurious touch, add a gold chain strap using metal clasps. These small accents elevate the bag’s appearance, giving it a boutique-worthy finish.
Don’t forget to secure the inside. You can stitch a fabric lining to the interior for extra strength and to prevent small items from poking through the stitches.
Tips for Customization
Here’s where you can make your crochet simple bag truly yours:
- Color Play: Go for vibrant tones for summer or earthy shades for a year-round neutral.
- Size Matters: Add more rounds for a larger tote or fewer for a cute clutch.
- Embellishments: Consider tassels, beads, or even embroidery to give your bag personality.
Pair your finished bag with a sundress, jeans, or even business casual for a fashionable statement. Its versatile shape and artisanal charm make it a standout accessory.
Why You’ll Love Making This Crochet Simple Bag
This project is more than just a weekend craft. It’s a testament to how something simple can be striking. The satisfaction of creating something by hand—and having people ask where you bought it—is priceless.
Plus, this crochet simple bag is practical. It’s roomy enough for your phone, wallet, and a few extras without being bulky. It also holds up beautifully thanks to the textured structure.
Whether you’re looking to make gifts, start a small business, or just unwind with a fulfilling project, this bag is a perfect entry point. It’s beautiful. It’s functional. And it’s entirely handmade by you.
Grab your favorite yarn and settle in. This crochet simple bag is a project that will quickly become your favorite—just like your new go-to accessory. You don’t need a huge skill set, just a hook, some patience, and the willingness to try something new.
Once it’s done, don’t be surprised if you start getting requests. This one’s a showstopper.
Tutorial and photos of this crochet simple bag by: bags crochet.