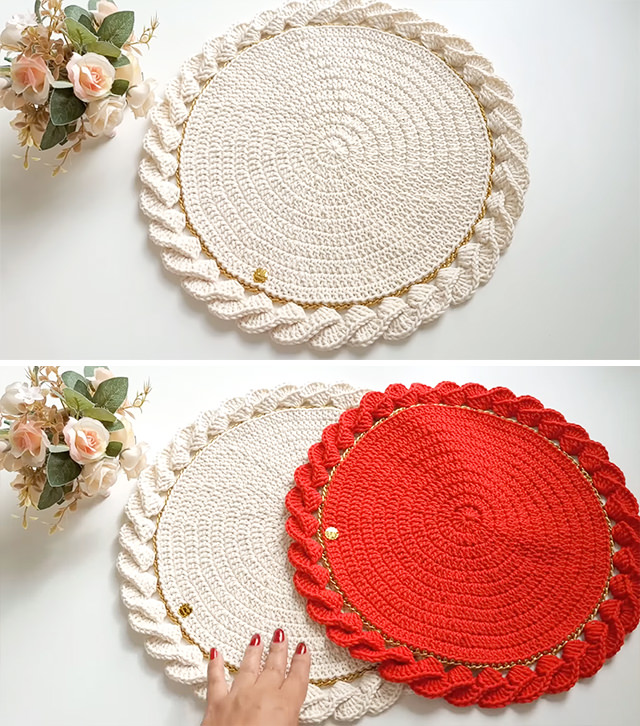
A beautifully handmade crochet placemat brings warmth, texture, and a touch of personality to any dining setting. Whether you’re dressing up your table for a special occasion or simply adding a cozy flair to daily meals, crocheting your own placemats is a satisfying and creative endeavor.

Why Crochet Your Own Placemat?
Crochet placemats aren’t just visually appealing—they offer function, durability, and charm. Here’s why they deserve a place on your table:
- Customization – Tailor them in any color, size, or shape to suit your decor.
- Eco-Friendly – Reduce dependence on mass-produced accessories with reusable, handmade pieces.
- Durability – High-quality yarn and good craftsmanship ensure they last for years.
- Handmade Appeal – Each placemat is a unique reflection of your creativity and care.
This guide walks you through the process of making a beautiful round crochet placemat—from materials to final touches.
What You’ll Need
Before you start stitching, gather the following:
- Cotton yarn – Durable, washable, and heat-resistant; perfect for placemats.
- 5mm crochet hook – Ideal for medium-weight yarn.
- Scissors – For trimming yarn ends.
- Tapestry needle – To weave in loose ends neatly.
- Stitch markers – Helpful for tracking rounds or complex repeats.
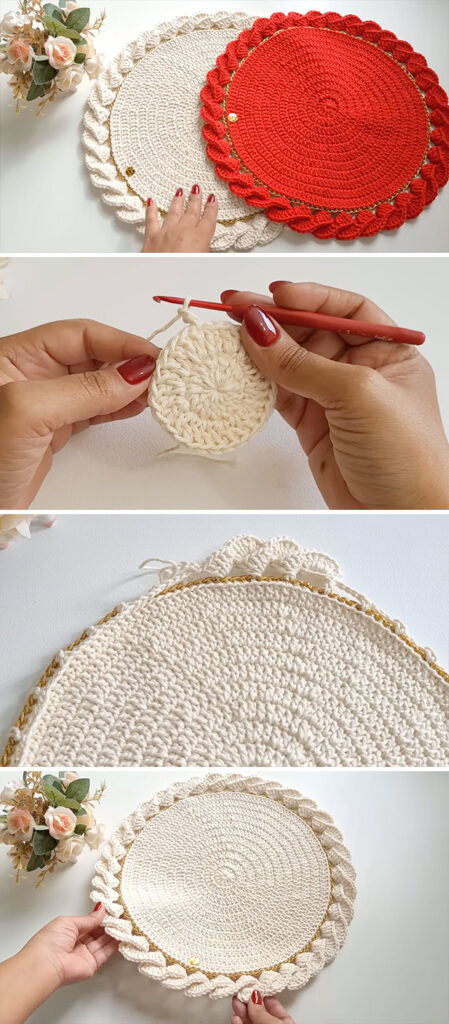
Step-by-Step: Crochet Round Placemat Pattern
Step 1: Start the Center
- Begin with a magic ring.
- Crochet 12 double crochet (dc) stitches into the ring.
- Pull the yarn tail tight to close the center, and join with a slip stitch (sl st).
Step 2: Grow the Circle
To keep your placemat lying flat, increase stitches evenly each round:
- Round 1: Chain 2 (counts as first dc), work 2 dc in each stitch around. Join with sl st.
- Round 2: Chain 2, (1 dc in next stitch, 2 dc in next) repeat around, join.
- Round 3+: Keep increasing by adding one more dc between increases each round. Continue until your placemat is about 12–14 inches wide.
Step 3: Add a Decorative Border
Give your placemat a refined edge with a simple scallop or picot stitch:
- Scalloped edge: Chain 3, skip one stitch, slip stitch into the next. Repeat around.
- Picot edge: (Chain 3, sl st into the first chain) after every few stitches for a delicate touch.
Step 4: Finish It Off
- Fasten off the yarn.
- Use the tapestry needle to weave in ends securely.
- Block the placemat by lightly dampening and shaping it flat to dry, ensuring a perfect circle.
Creative Design Variations
Want to put your own twist on it? Try these ideas:
- Striped placemat – Use multiple yarn colors for bold, vibrant stripes.
- Lacy style – Incorporate openwork stitches for a lighter, more delicate look.
- Square version – Use granny square techniques instead of a circle.
- Beaded edge – Add pearl or metallic beads for an elegant finish.
Caring for Your Crochet Placemat
Keep your handmade placemat looking fresh:
- Handwash or machine wash on a gentle cycle with mild detergent.
- Avoid bleach and harsh chemicals.
- Dry flat to retain shape and prevent stretching.
- Iron with care—if needed, use a pressing cloth and low heat.
More Than a Table Setting
Crochet placemats are versatile! Use them to:
- Decorate centerpieces or accent trays.
- Protect surfaces under vases or candles.
- Add charm to coffee tables or nightstands.
- Create thoughtful, handmade gifts.
Final Thoughts
A crochet placemat is more than just a functional item—it’s a creative expression that brings comfort and character into your home. Whether you stick to a simple design or explore intricate patterns and colors, this project is a joyful way to combine beauty and utility.
So grab your yarn, pick your favorite hook, and start crocheting your next home décor masterpiece!
Tutorial and photos of this crochet placemat by: Vanessa Marcondes.