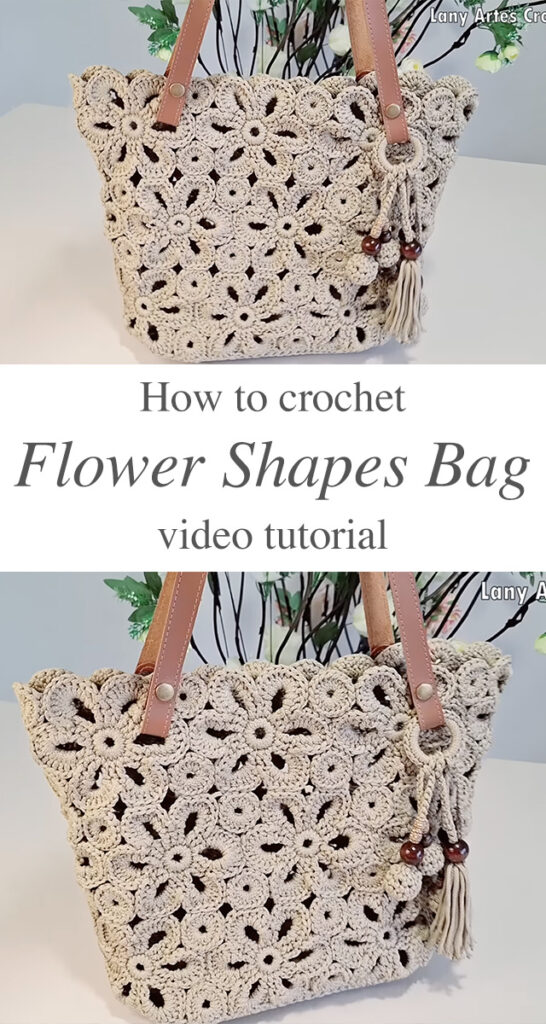
Crochet lovers are constantly on the lookout for their next artistic challenge, and the crochet flower-shaped bag offers a stunning and functional project.
Why Choose a Crochet Flower-Shaped Bag?
A crochet flower-shaped bag is more than just a stylish accessory—it’s a bold statement. Its intricate floral patterns offer a timeless vintage charm, while its versatile design pairs effortlessly with both casual and dressy looks. This delightful bag merges delicate floral motifs with sturdy craftsmanship, making it both striking and practical. Whether you’re an experienced crocheter or a beginner eager to enhance your skills, creating this floral masterpiece is a rewarding project worth your time.
Creating this bag also gives you the opportunity to practice intricate stitches and refine your motif-joining techniques. With limitless color combinations, you can design a truly unique and personalized piece.
Materials You Will Need
To create a crochet flower-shaped bag, gather these supplies: Choose sturdy yet soft yarn like cotton or a durable acrylic blend. Select neutral tones or vibrant hues based on your preferred style. Use a crochet hook size suitable for your yarn, typically a 3.5mm hook. Leather or wooden handles add a polished, professional touch. A tapestry needle is essential for weaving in ends, and sharp scissors ensure clean, precise cuts.
🌸 Step-by-Step Guide: How to Make Your Crochet Flower Bag
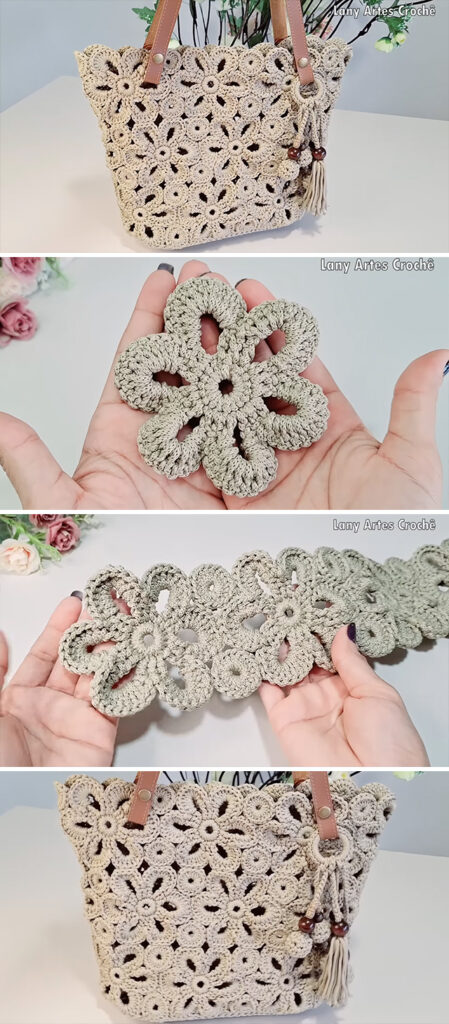
1. Crochet the Floral Motifs
Start by creating the signature flower motifs that form the base of your bag:
- Begin with a magic circle.
- Work a round of double crochet stitches to form the flower’s center.
- Add the petals using a mix of treble and chain stitches.
- Secure each motif with a slip stitch to finish.
- Repeat until you have multiple motifs, all uniform in size for a cohesive and balanced look.
2. Join the Motifs
Now it’s time to bring the flowers together:
- Lay out the motifs in a symmetrical pattern.
- Join them using a tapestry needle or slip stitch, depending on your preferred technique.
- Create two identical panels—one for the front, one for the back of the bag.
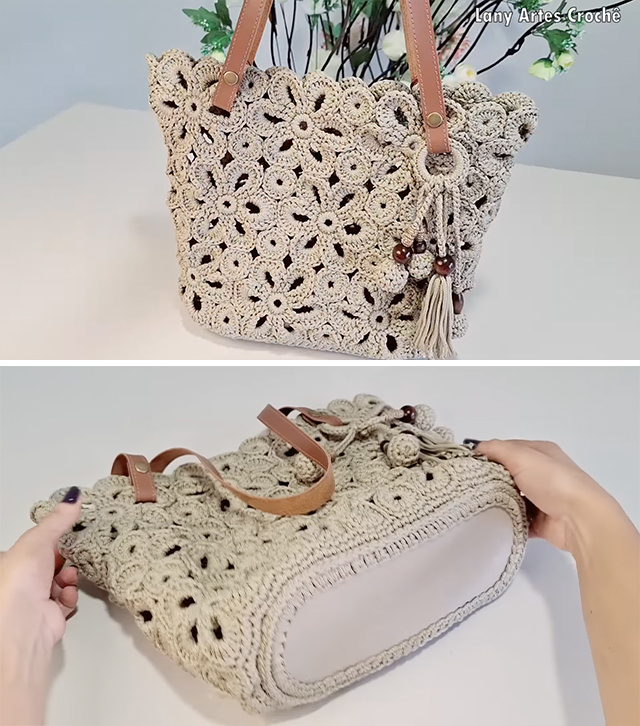
3. Shape the Bag
With your panels ready:
- Crochet around the edges to join the front and back together.
- Reinforce the bottom with a few extra rows of single crochet stitches for added strength.
- Pay close attention to the corners, ensuring clean, sharp edges for a professional finish.
4. Add Handles and Final Touches
Complete your bag with functional and decorative details:
- Attach handles securely using reinforced stitches.
- For durability, consider lining the inside with fabric.
- Embellish with tassels, beads, or lace to enhance the floral vibe.
🌼 Creative Variations
- Color Play: Use a mix of yarn colors to mimic a blooming garden.
- Size Tweaks: Make a small clutch or scale up for a roomy tote.
- Embroidery: Add embroidered vines or leaves for extra charm.
💐 Styling Tips
Pair your handmade bag with:
- A breezy summer dress
- Casual jeans and a top
Perfect for beach days, picnics, or weekend strolls—this bag brings a feminine, artsy flair to any outfit.
🧺 Care Instructions
To keep your crochet flower bag looking beautiful:
- Hand wash gently with mild detergent.
- Lay flat to dry to maintain its shape.
- Store in a dry, cool place to avoid moisture damage.
Creating your own flower-shaped crochet bag is more than a DIY—it’s a celebration of your craftsmanship. With each stitch, you bring a piece of art to life. Start your project today and carry a little garden wherever you go! 🌷ay and carry your handmade masterpiece with pride!
Tutorial and photos of this crochet flower shaped bag by: Lany Artes Crochê.