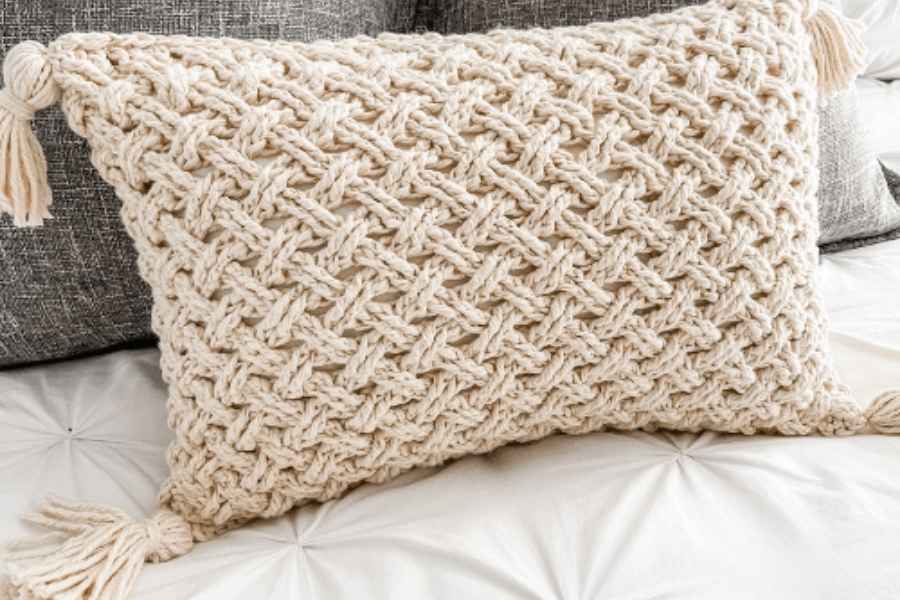
The Celtic Weave Stitch is a richly textured, interlocking cable design that adds elegance and depth to any crochet project. When used in a throw pillow, it creates a luxurious, hand-crafted look that stands out in any room. While the stitch may look complex, it’s built using post stitches and pattern repetition — making it an achievable project for adventurous beginners and intermediate crocheters alike. In this guide, we’ll explore materials, the stitch technique, and how to assemble a beautiful Celtic Weave pillow cover.
1. Materials and Preparation
To start your Celtic Weave Throw Pillow project, gather the right materials:
- Yarn: Worsted weight (Category 4) or Aran yarn works well. Choose a solid or heathered color to let the texture shine.
- Hook: 5.5 mm (I-9) or suitable size for your yarn.
- Pillow insert: 16″ x 16″ or desired size.
- Notions: Yarn needle, stitch markers, and scissors.
Gauge tip: Work a small swatch of the Celtic weave to check that your stitch height and width match the intended dimensions. The pattern is dense, so use a hook that creates some flexibility while maintaining the structure.
2. Mastering the Celtic Weave Stitch
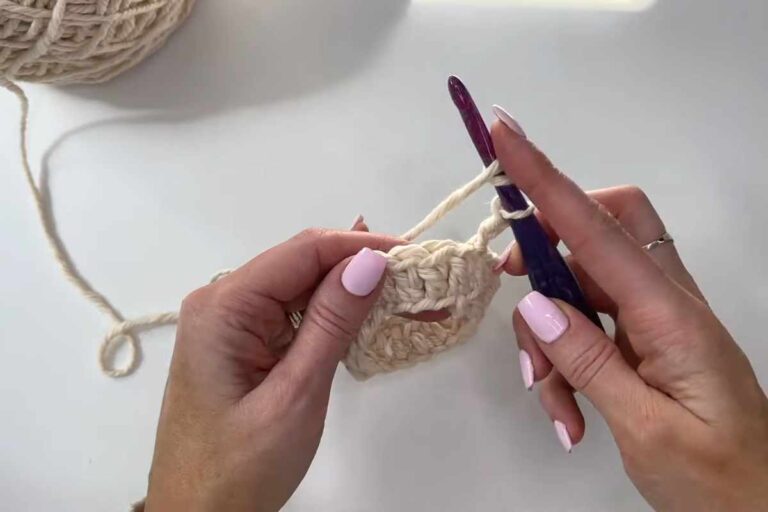
The Celtic Weave Stitch is a combination of front post treble crochets (FPtr) and crossed stitches, creating the illusion of woven braids or cables.
Key stitches:
- FPtr (Front Post Treble Crochet): Yarn over twice, insert your hook around the post of the stitch (from front to back), and complete a treble crochet.
- Crossed stitches: Worked by skipping stitches and then going back to work into the skipped ones, creating the woven look.

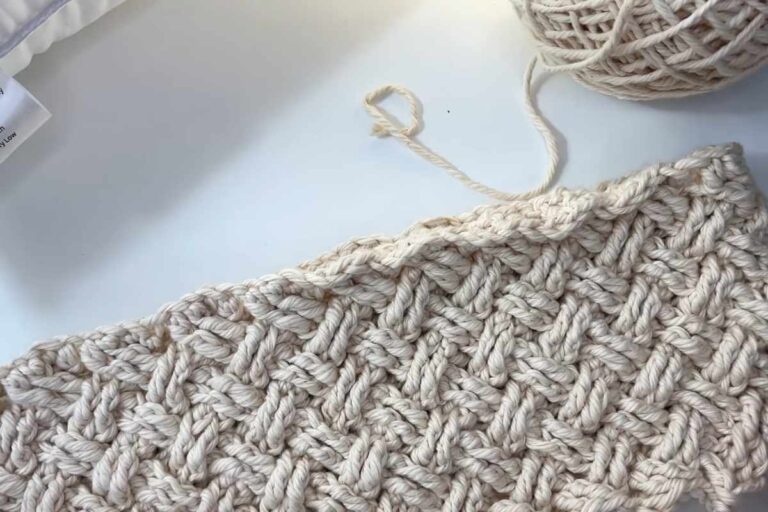
Pattern example for a panel:
- Chain a multiple of 4 + 3.
- Row 1: Dc in each stitch across.
- Row 2: Begin working FPtr around selected stitches to start the weave.
- Repeat weave rows using crossing FPtr stitches, skipping and working back into previous stitches to form the Celtic braid pattern.
Tip: Watch a Celtic weave stitch video tutorial if you’re new to post stitches — seeing the crossing in action helps clarify the pattern.
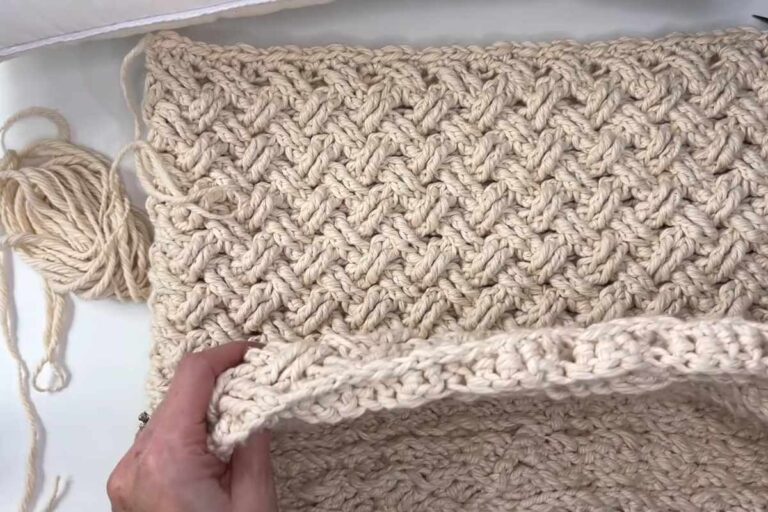
3. Constructing the Pillow Cover
Once your front panel is complete using the Celtic weave pattern, it’s time to finish the pillow:
Option 1: Envelope Back
- Create two back panels (e.g., each 16″ wide x 10″ tall).
- Use simple rows of half double crochet or double crochet for quick progress.
- Overlap the two panels, place them behind the front, and seam around the edges using single crochet or whip stitch.
- Turn right side out and insert your pillow.
Option 2: Zipper Closure
- Work one solid back panel (same size as the front).
- Sew a zipper to one side for easy removal.
- Seam the remaining three sides closed.
Edging idea: Add a round of single crochet around the pillow edges for a clean finish or contrast border.
Conclusion
The Celtic Weave Throw Pillow is a stunning way to showcase texture, skill, and style in your home. Though it looks complex, the project becomes manageable once you master the post stitch technique and get into the rhythm of the weave. Whether you pair it with cozy blankets or use it as a standalone statement piece, this crochet pillow brings handmade charm and timeless design to your space.
Pattern and tutorial by MJ’s Off The Hook Designs
https://www.youtube.com/watch?v=wwLGtpIyAgI