🧶 1. Introduction
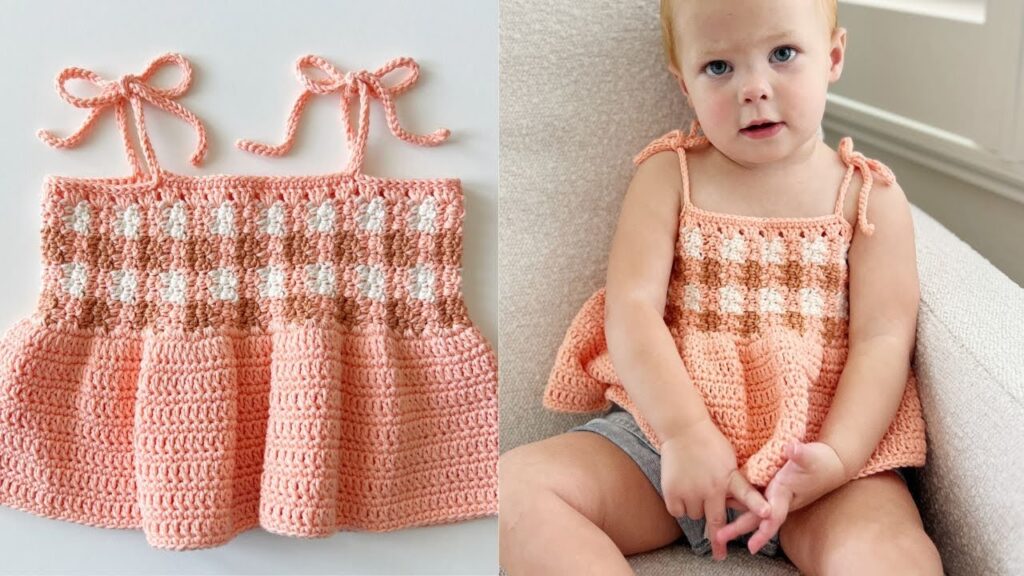
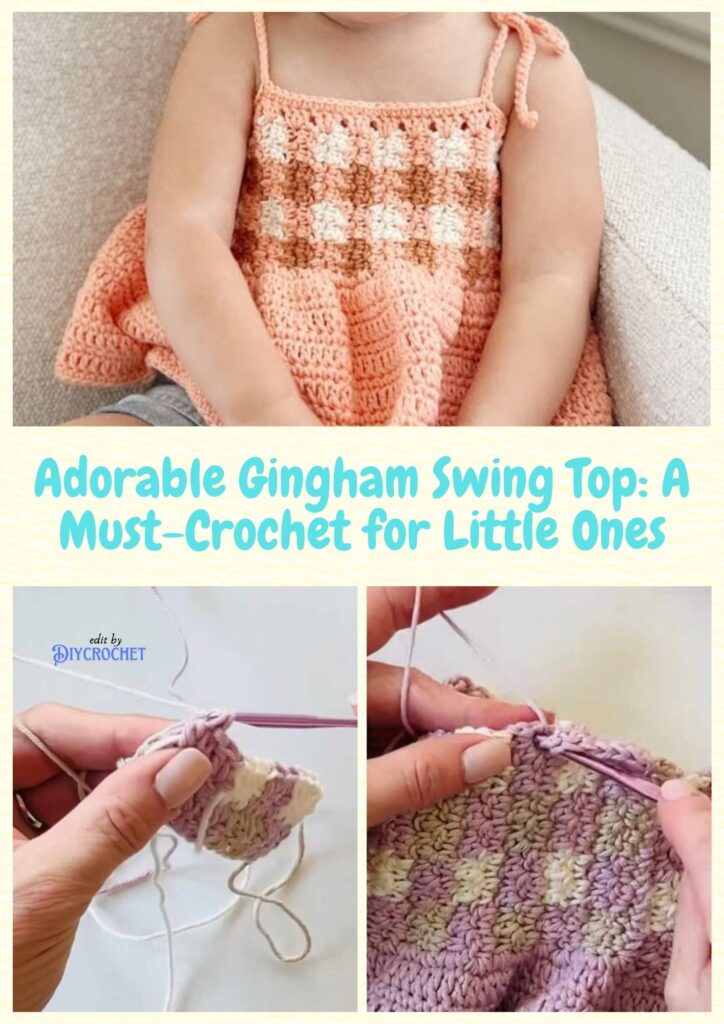
The Gingham Swing Top is a flowy, breezy, and playful crochet top with a charming checkered pattern — ideal for spring and summer. With its roomy shape and soft drape, it’s perfect for active little ones and makes for a beautiful handmade gift.
🧵 2. Materials Needed
- Lightweight (DK or sport) cotton yarn in 2 or 3 colors (gingham effect: light, medium, and dark tones)
- 3.5 mm or 4.0 mm crochet hook
- Yarn needle
- Scissors
- Stitch markers (optional)
- Buttons or ties for back closure (optional)
🧸 Stitches used:
- Chain (ch)
- Single Crochet (sc)
- Half Double Crochet (hdc)
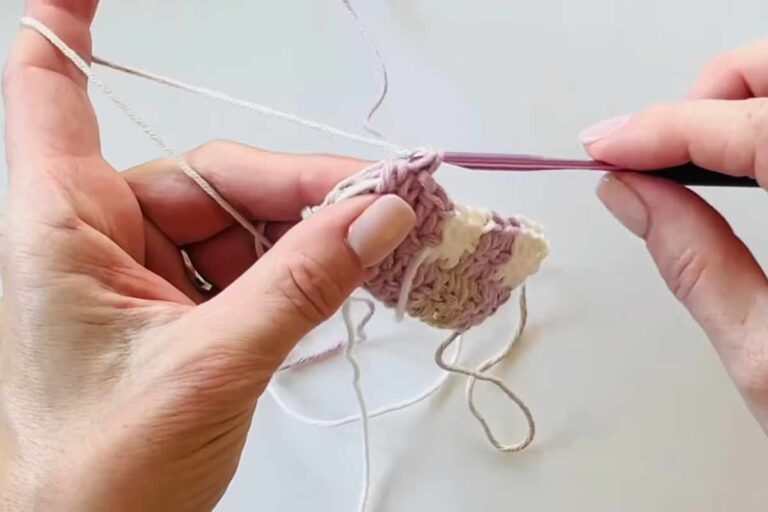
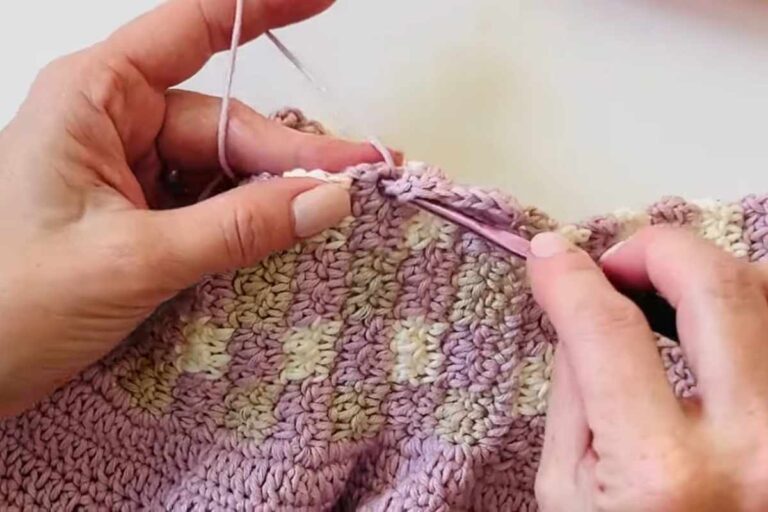
- Color changing technique for gingham
📌 3. Pattern Notes & Gingham Tips
- Gingham uses alternating color blocks (e.g., 2 rows of A, 2 of B) to form the pattern
- Each square is made of a set number of stitches (e.g., 4–6 sts wide)
- Carry unused yarn along the back to avoid cutting
- Top is worked in 2 rectangles (front and back), then seamed at the sides with an open swing bottom
🪡 4. Step-by-Step Instructions
🧷 Step 1: Gingham Pattern Prep
Choose 3 yarns:
- Color A: Light tone
- Color B: Medium tone
- Color C: Dark tone
Alternate these to create the gingham effect by working stripes of alternating color blocks.
👚 Step 2: Front and Back Panels
- Chain to the desired width (usually 70–90 sts for baby sizes)
- Work in hdc rows, alternating color blocks every 4–6 stitches and rows
- Continue until the panel measures about 8–10 inches in height (adjust for age)
- Make two identical panels
🧶 Step 3: Shaping the Armholes & Neckline (Optional)
- On the front panel:
- Work straight for 2–3 inches, then decrease slightly for armholes
- Leave a center space for the neck (about 3–4 inches), and work each side separately
- Back panel can be square or split with a button closure
🧵 Step 4: Assembly
- Sew side seams, leaving openings for arms
- Sew shoulders or attach with buttons/ties for easy on/off
- Add a border (optional):
- SC around armholes, neck, and bottom hem for a clean finish
🎀 Step 5: Final Touches
- Add bows, ruffles, or edging for extra charm
- Optionally, add buttons at the back or straps for ease and style
- Block the top gently to even out the gingham squares
✅ 5. Conclusion
Your Adorable Gingham Swing Top is finished! 💕👶
It’s breezy, bright, and full of handmade charm — a must-have piece for warm-weather wardrobes or photo sessions.
Pattern and tutorial by Daisy Farm Crafts